Wednesday, August 31, 2011

Using Auto Resolve for Battles

One feature that many turn-based games allow is for a battle to be fought off-screen automatically by the computer. This can be helpful in situations where one army vastly outmatches the other and the player doesn't want to waste his time fighting it out manually. It's a good feature for a game to have if battles take a lot deal of time to complete, especially if you can't save the game in the middle of one.


No game developer wants time to be what a player is most focused on.

However, one concern I always have when I use auto-resolve is how does the computer calculate who wins? Does it actually fight the battle out using its own AI in the battle system quickly? Does it roll some dice behind the screen based on the relative strength of both sides? Let's look at a couple turn-based games to see how this seems to work.

Heroes of Might and Magic
The earlier Heroes of Might and Magic games are some of the easiest to see how the computer resolves battles. You don't have an option to have it resolved off-screen, but you can have the computer automatically fight for you if you choose, saving a few mouse clicks. It does a fairly competent job, focusing on taking enemy ranged and flying troops out of the action as soon as possible.


In this instance, the computer has the player's hero cast meteor swarm to kill some enemy gryphons.

In later games in the series, the option was added for the computer to do this completely off-screen. I tried it a couple times and it seemed to not be too unfair, the side that seemed to have a superior force won. I never attempted it for a fairly even battle though.

The one time I would complain about this system is that the computer is no good at unconventional strategies. For example, in most of the Heroes games when you are defending a castle under siege you have arrow towers that fire each turn to hurt the enemy. One way to win if you are vastly outnumbered can be to avoid fighting and move your soldiers around all over the battle map so that the enemy troops can't catch up to kill them. Over time, the arrow towers can potentially kill the entire besieging force.

Another example is that heroes can learn to cast a spell that summons stacks of creatures like air or fire elementals. A player with a weak to nonexistent army could choose to keep casting this spell for as long as they have magic points left and win a battle through attrition if the enemy force can't kill them fast enough. They will lose all of the summoned creatures after the battle and die, but at least they'll take out the enemy as well.


A Pyrrhic victory is still better than no victory at all for some.

So the lesson from the Heroes series is that auto resolve can be programmed to be pretty fair, just don't rely on it to win any battle for you that require guile or odd tactics.

Medieval II Total War
I apologize for writing so much about this game, but it's the only game I've played much recently so it's fresh in my mind. Every battle that's initiated on the main world map has a screen go up beforehand that shows the strength of all of the sides involved.


In this instance, Admiral Davy of England vastly outmatches the opposing pirate navy, as indicated by the bar in the center.

A player may then choose to fight the battle manually or have the computer resolve it instead. If it is a naval battle, auto resolve is the only option available. For the most part, it seems to be a fair system. The system weighs the odds and then fights it out. There are a few large problems with it though.

One issue appears when an army fights one vastly inferior to it. For example, if 500 plate armored knights with swords forged by master blacksmiths fight 20 unarmored peasants with pitchforks you would expect the peasants to be utterly annihilated. Well, they are, but instead of being eliminated from the world map entirely they usually are reduced in number slightly and stay on the map, now as a force of 15 unarmored peasants. This can be extremely irritating when you're trying to eliminate some of the rebel armies that randomly appear on the world map every now and then. It seems stupid to go through all the effort of commanding your giant army to kill 20 peasants, but you have to do it if you want them to actually be removed completely from play.

The only reason I can think of for why this occurs is that when you fight a battle manually it can end in two ways-when the enemy army is completely slaughtered or when every enemy army unit is routed and fleeing. When the enemy is routed you can choose to end the battle there or continue the battle and capture as many of the fleeing soldiers as possible. I guess that auto resolve must stop the battle when it determines that the enemy has routed so it doesn't finish the gruesome business of killing everyone.

Another problem occurs with the traits and rewards for the commanding generals of battles. During the game, each of a player's generals can acquire better traits when they win a battle. For instance, they might gain another star of command rating, which gives all units under their command bonuses in battle. They also might acquire new people to their retinue of support staff, most of which give small bonuses to the general. A victorious general might get a shieldbearer, who gives the general more health, making him more difficult to be killed during a battle.

When a battle is resolved automatically, it seems that these bonuses are not granted as frequently as when the player fights them on the battle map. This may not be a problem, as it offers an incentive to actually use the real time battle system, but it can be disappointing if you're in a hurry and don't have time to fight every battle of a campaign out.

The last problem is the most major one-the auto resolve system does not appear to consider city or castle walls at all in its calculations.


Which may just be a little bit of an oversight when those walls are as tough as these. And also feature ballista and arrow towers that hurl hundreds of fiery bolts at the attacker.

Even in a battle where the town defender is nothing more than one old man with a stick, any attacking force will take at least 5-10% casualties just getting over or through the walls. When the defenders have archers and some spearmen to hold the gate and walls, the attacker needs to have 2-3 times the number of defenders to have a chance of winning. Why is this the case?

Well, an attacker has four options to attack a city. When besieging a city, an army can construct three items: rams, ladders, and siege towers. Rams can be used to break down the main gate of the castle and also to break wooden walls that are part of the lowest upgraded levels of towns and castles. Ladders can be used by infantry units to climb the walls of a castle or town and try to take the battlements. Siege towers are slowly rolled up to the walls and then open up to unleash the troops inside on the battlements. The fourth option is to bring along artillery such as ballistas, catapaults, or cannons to destroy the walls and towers entirely.

These sound like good options, but in practice, rams and artillery are the only good tool from this list. Soldiers climbing up on ladders take heavy casualties when walking up to the wall and don't reach the top in numbers sufficient to defeat any units they encounter, even the weakest defenders like peasant archers. Siege towers are a little better than ladders, as 20 or so troops instantly deploy on to the battlements instead of 3 at a time when ladders are used, but they still tend to lose to any decent defending troops.


They also can be set on fire while they're moving into position, which makes them just a little bit unreliable.

So that leaves rams, which can destroy the main gate to allow the besieging force to move in for the kill. Unfortunately, the nature of a gate is that it forms a stopgap that's difficult to pass. Any wise defender positions most of their soldiers at the gate so that when it's broken down the attacker cannot rush in, they're stuck trying to make it past a hedgehog of spears, pikes, and swords. Even a tiny defending force can usually hold the gate, it's just too difficult for attackers to get a foothold inside.


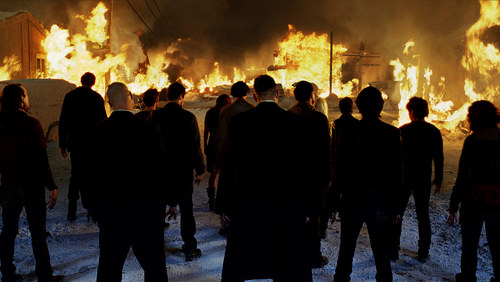
Venice's armored knights aren't having much luck making it past England's spear militia.

In addition to that problem, the attacking force still has a tail end waiting to move in that's stuck receiving the fire of all the archers and towers, resulting in heavy casualties before they get under cover.


Finally out of bowshot, the Venetian soldiers were relieved. Unfortunately, they barely caught a breath before being hurled into fierce close combat fighting with spears and swords.

That leaves the best option for a besieging force, bringing along artillery to destroy the walls and arrow towers entirely. This limits casualties the most of the four options, but even opening holes in the walls is not sufficient to protect an attacking force enough. Each of those gaps in the walls still leaves a plug which a defending force can assemble behind to limit the number of attackers who can enter at a time.

When auto-resolve is used for a castle siege, the game doesn't seem to consider any of this and will tend to base it entirely on the number and quality of troops involved. If you instead choose to fight it manually, the result is that the defender will almost always prove victorious.


Usually decisively so.

Conclusion
When using auto resolve for turn-based games, try and figure out how it bases the result. It may be that you are at a severe disadvantage if you use the system, as if you rely on it for defending your castles in Medieval II Total War. It may also be quite fair, as in Heroes of Might and Magic.

Sunday, August 28, 2011

Macromanagement in Total War

This article covers macromanagement in the Total War series. Again, it's best to begin with a definition of the term.

Macromanagement refers to actions taken by the player that build buildings, units, gather resources, etc. It basically contains all of the generalized actions that make your army larger and more powerful. An example of a game with an extremely heavy macromanagement focus is Age of Empires II.


An example of an Imperial Age Teuton player's military.

In this game, the player has to spend a significant amount of resources to advance their age through four ages, from the Dark Age to the eventual Imperial Age. Each time a player upgrades their age they gain access to many new units, buildings, and upgrades. There are also four resources in the game where most RTS games have one or two at the most. This means that players have to make a lot more resource gathering workers than is typical and also choose where to deploy them to fit the needs of their military. For instance, if a player wishes to build large numbers of knights they will need to focus on gathering food and gold. The primary focus of combat in the game is focused principally on building larger numbers of better upgraded soldiers than an opponent. This makes the game a macromanagement oriented player's dream-whoever does the best at gathering resources and building the largest army usually proves victorious.

Macromanagement in Total War
All of the macromanagement actions in the Total War series are performed during the turn-based portion of the game. To some extent, this makes it less stressful than in other RTS games, as you don't have to figure out which workers to send to gather resources while also managing all of your military units. You have time to think about the best choices to make.

So where does the challenge of macromanagement come into play in Total War? There are four main strategic areas a player must consider: income, costs, construction time, and troop deployment.

Income
Resource gathering works a bit differently than in many strategy games. In Medieval II Total War the currency in use is called florins, and it is used to purchase everything from buildings to mercenaries to regular units. The major difference is that instead of workers you control producing income, settlements produce almost all of a player's income. This wealth is produced through taxation of the population, farming incomes, mining incomes, and trade. Players can choose to upgrade the buildings in a settlement to produce more income from each of these revenue streams.


For instance, adding mines to Genoa adds 200 florins a turn in revenue to the city.

The main difficulty is that the player must balance producing, maintaining, and moving armies around the world with building revenue enhancing structures, improving military producing structures, taking new settlements, and maintaining good public order in existing settlements. This can be quite a challenge because players can't just build more workers to produce gold, the only major way to improve income is to take new cities. Unfortunately this requires sending out armies to claim them, which costs money in itself.


Plus Milan isn't happy when the reason you attacked their capitol is that "you needed the cash."

One of the additional changes in Medieval II Total War is that settlements may be castles or towns. Towns produce much higher trade incomes than castles so they tend to yield a great deal more money than castles. Castles, on the other hand, are harder for an enemy to take in combat and build stronger military units. A player may choose to change a castle to a town or vice versa until they reach the highest level of upgrade.


The screen to switch settlement types.

This leads to one strategy to maximize income-convert castles in well protected areas of your empire to towns so that you get more money out of them. It doesn't make sense to have a fortress in the middle of Ireland where there aren't any enemies around.

There are also two smaller ways to produce income in the game. One new unit added to Medieval II Total War is the merchant. There are numerous small resources scattered about the world map in the game, ranging from slaves to gold to amber. A player can place a merchant on these resources to trade in them, which generates a sum of gold based to some degree on the rarity of the resource, the merchant's skill level, (which rises with time spent trading and also by taking out rival merchants), and how far the resource is from the player's base of power. For instance, an English player's merchant gathering lumber right next to London would probably generate about 7 florins a turn, which is about enough to buy five spears for a single spearmen unit. If that merchant was instead gathering ivory in the Sahara desert, that would produce 200-300 florins a turn, a much better option.


A Moorish merchant trading in France.

However, I do not personally think merchants are worth the time and effort to manage. The main issue is that merchants can be "attacked" by other faction's merchants and taken off the field of play if the other merchant has a higher finance skill. This is calculated somewhat randomly so if you aren't the type of player who likes to reload the game a lot you will not have merchants for very long. One of the few things the computer does well is to build lots of merchants and use them to attack rival player's merchants. Additionally, the wealth generated by merchants is quite small compared with settlement revenue. Even if you have four merchants generating 300 or more florins a turn, an exceptional occurrence, that still only generates as much money as a typical small town.

The final small income boost is generated by stationing a general or family member in a town or castle. This allows them to be the governor of the settlement, adding his own personal bonuses to the town's incomes. For example, if a general with mining knowledge is in a settlement with extensive mines, that mining revenue is boosted by 10%. Generals can also improve public order, allowing more military units to be pulled from the town to fight elsewhere, lowering upkeep costs.


Unfortunately, most generals get traits like "Sadly Ignorant" which reduces a town's trade and tax income by 5%...

That sums up the discussion of income, so what does all that money get used to buy?

Costs in Total War
The largest costs in the game are incurred when upgrading and adding structures that allow new military units to be produced. The best units in the game require humongous investments of resources to field-sometimes going up to 30,000 florins or more. When a basic infantry unit costs about 300 florins, that's basically the price of a small army. Even mid-range units like armored swordsmen in the image below cost a good 10,000 florins to be able to produce.


Although they look awesome enough to be worth the price.

Even worse-each of the types of units-cavalry, archers, infantry, etc. is built through a different building upgrade tree. So if you want to build a force of the best infantry and archer units for your faction you have to upgrade two different structures to the maximum level. This is quite an expensive task. So why is it important to do this? It seems like it would be more cost effective to just build a bunch of the cheap spearmen units instead.

The main issue is that the less expensive units just don't stand up in a fight later in the game. A force of knights will carve up a group of peasants with pitchforks without losing more than a couple men at the most. Additionally, every unit in the game has an upkeep cost that has to be paid every turn. The upkeep costs for cheap units aren't much lower than the more expensive ones, meaning that you aren't saving much money in the long run.


It's also a bit embarrassing when your entire army consists of these guys.

This leads to another concern when upgrading your military unit producing structures-building time.

Time
Most structures take multiple turns to construct with more advanced military and economic structures taking half a dozen of more turns. This means that a player has to consider their goals carefully when deciding what to build. It is foolish to try and upgrade every city and castle to produce the best available units. That takes far too much time for each settlement and also is a waste of hundreds of thousands of florins that could be put to better use building more soldiers. A better idea is to coordinate building upgrades among the settlements in a region. For instance, in a section of the map with three castles, a player could upgrade one to produce heavy cavalry, one to produce heavy infantry, and the last to produce archers.

For an example of how much money and time that coordination saves, let's assume that it costs 5,000 florins to build each building for each unit type and that they each take five turns to construct. The price for upgrading every castle for all three units versus one unit type in each is as follows:

5,000 x 3 castles x 3 unit types = 45,000 florins
Build time- 5 turns x 3 structures= 15 fifteen turns

Compare that with only upgrading one in each castle:
5,000 x 3 castles x 1 unit type each= 15,000 florins
Build time- 5 turns x 1 structure= 5 turns

A 66% discount is a pretty good deal, no?

An additional consideration is that revenue producing structures like mines, docks, and farms also take multiple turns to complete. It's important to consider where to place them in the construction docket so that you have more income later.

That brings us to the last main macromanagement area of Medieval II Total War, troop deployment.

Military Deployment
One common military maxim is that one soldier on hand is worth more than ten available at some unknown point in the future. This is extremely important throughout any Total War game as armies are spread out over a continent-spanning world map. It doesn't matter how many soldiers you have in Africa if the battle is in Europe.

This maxim even applies to individual armies. It's better to have all of your soldiers consolidated in one army if possible. This is because reinforcement military units don't deploy alongside your army on the real-time battle map. They will enter the field from a different direction-possibly one that is a long hike from the main army. This can allow an enemy army to destroy your main army in detail and then turn to crush the reinforcing army as well.


As in this example, where the total numbers of all three Scottish armies were roughly equivalent to the English force, but the English force charged forward and destroyed each individual Scottish force with ease in the actual field battle.

This has a great deal of relevance to strategic decisions throughout the empire as well. It makes no sense to leave large forces to garrison cities and castles that are not near enemy factions. They are most unlikely to be attacked, send those soldiers forward to towns and castles that are on the front lines of whatever wars you current face.

Conclusion
Although the macromanagement of Medieval II Total War is done in a turn-based setting, taking away the urgency of decision-making, it still takes a good deal of thought to do well. A player who does not make good choices will end up bankrupt and with inferior forces to their opponents. Also consider that a Total War game takes a lot longer than most other games so short-sighted economic and military decisions to win a current war may come back to haunt you later in the game!

Wednesday, August 24, 2011

Errors in Healthcare-Medications & Surgery

It's become a well known fact that healthcare systems throughout the world make a large number of errors every year that can have horrific consequences for patients. Patients may receive the wrong medication, medications that have unexpected interactions with each other, and suffer surgical errors. The reasons for these problems can be anything from a misidentified patient receiving a different patient's medication, a surgical team confusing a left arm for a right arm, or a medication order not being updated to reflect a patient's changing condition.

The one element most of these errors have in common is that they are usually inflicted when hospital staff are in a hurry, either because they are behind schedule or there is an emergency situation. A surgical team starting a routine procedure one hour late may try and rush through all of the pre-operative steps in order to get done for the day on time. This can be problematic if one of those steps that was glossed over was which kidney was supposed to be removed. To paraphrase comedian Tom Shllue, "So you're telling me that one of my kidneys is bad... and now you have the good one!?"


Unfortunately, saying oops isn't usually enough in healthcare.

How bad is the problem?
Unfortunately, medical errors are a humongous problem in the United States. Medical errors of all sorts kill approximately 43,000 Americans a year according to the CDC. Medication errors alone kill 7,000 or so and inflict grievous harm on many more. As medical technology improves it has allowed many patients to be saved but it also means that healthcare workers need constant reeducation on how to perform those new skills, handle that new equipment, and the risks and dangers of new medications and treatments. When that constant flow of new information is combined with a hectic hospital environment where each staff member has to treat multiple people each day, it can easily lead to serious problems.

For an example of how easy it is to make an error, most hospitalized patients are on at least five different medications. Some of these may be pills taken orally, other drugs go through IVs, some are injected into the skin, and some are pushed through J or G tubes-devices that enter the stomach or small intestine. So with a typical 3-4 patient caseload for a nurse, that's twenty or so different medications for different patients, some with different routes of administration, some of which may have to be given multiple times each day. Combine that amount of information to remember with the exhaustion brought on by 12 hour or longer shifts that some healthcare workers perform and you have a recipe for disaster.


How a hospital looks after 16 hours of working there. Medication labels don't look any sharper unfortunately.

When a sleep deprived person tries to deal with information that has multiple steps, like what medication is supposed to go to who, or which patient is getting what surgery on which body part, it's easy for screw-ups to occur. So how do we fix this problem? Fortunately there are a couple methods to stop the easily preventable mistakes that keep occurring in healthcare-medications errors and wrong-site or incorrect surgery.

Medication Barcoding
Barcoding medications works like it does with UPCs in a supermarket. Every patient room is equipped with a computer and a barcode reader. All the medications in the hospital are labeled with a barcode that can then be scanned, verifying what the medication is, its dose, and other important information about it. This is compared with the patient's medication profile in the hospital's computer system to make sure that everything is correct-this is the right medication and dose for this patient.


Aricept tablets with barcode on the side.

The scanner is then used to scan the patient's wristband. Every patient in hospitals has these wristbands nowadays to ensure that they can be identified easily. If the medications that were scanned don't match up with the wristband that is scanned, the barcode system will deliver an error message and the person giving the medications will know that something is wrong and take a look at the problem.


Unfortunately, you can't just call for a price check to figure out the problem like you can at Wal Mart.

If used properly, this system prevents the vast majority of medication errors. Any staff member will get a warning that they're doing something wrong if they brought the wrong patient's medications into a room, have the wrong dose, or some other problem.

The main problem with the system is that it takes a bit more time than older methods of medication administration. Barcodes can also be torn, difficult to scan, or non-functional for other reasons. This necessitates a manual override being available for the system, but many staff members misuse this to give a lot of medications in a hurry when they're busy or behind in their shift. It's important for this inappropriate use of manual overrides to be unacceptable in a hospital organization for the system to work. Fortunately, it only takes one error being caught to make staff members get on board with the system.

Surgical Checklists
Airlines and other complex high risk industries have been using checklists in their normal course of operations for decades. They make sure that pilots and other staff don't forget any important details when they are preparing to do their job.


Killer shades? Check!

Most surgeries, particularly routine surgeries, still have a number of steps that have to be taken before each procedure to make sure that everything is correct. The patient is usually under anesthesia when they are brought into the operating room, so they are unable to verify any of this information. The patient must be identified, the surgical site and surgical procedure confirmed, the use of pre-incision antibiotics discussed, and any potential complications brought up as well. For instance, if the patient had a blood clotting problem that might be a special concern to bring up, as blood would need to be available in the event of an unanticipated severe bleed.

To resolve this problem, many hospitals now use a timeout before a surgery begins that discusses all of these problems. Look at this video to see an example of a good timeout.


Of course, there are plenty of surgeons and other staff who don't see the point of taking a few minutes at the start of every procedure to do this. Here's a couple examples of poor timeouts.


Conclusion
Medical errors continue to occur at unacceptable rates. Barcoding medications and surgery timeouts are too ways to prevent some of the worst errors-inappropriate medication administration and wrong site or wrong procedure surgery. However, they are only effective when they are taken seriously by staff. It may take a few minutes of time, but it's well worth it when it prevents a lifetime of disability to the patient.

Friday, August 19, 2011

Micromanagement in Total War

This article will cover how micromanagement is employed in the Total War series. Firstly, a definition of what micromanagement means in the context of a turn-based and real-time strategy game is important to give.

Micromanagement refers to commands given to specific units to make them more effective at what they do. Let's use an imaginary example of one player using archers against an enemy advancing with pikemen. If the player with the archers doesn't do anything each of his archers can fire three arrows before the pikemen reach the archers and begin cutting them to ribbons. However, the player commanding the archers can move them backwards away from the pikemen between each volley of arrows. This allows them to fire more arrows before the pikemen reach them, potentially four or five volleys instead of three. If the archers are able to move faster than the pikemen, this will actually allow them to kill all of the pikemen without taking a single hit in return. An example of a game that has an extremely strong emphasis on micromanagement is Warcraft 3.


An Orc player fighting against a Human player in Warcraft 3.

In Warcraft 3 players control a rather small number of units compared with many other RTS games. Players are limited to a maximum of 100 total population and most units take up at least 2 population. This means that even the largest battles will only have twenty or so units on each side. In comparison, a large battle in Age of Empires II could easily have one hundred or more soldiers on each side. Warcraft 3 focuses the player's attention on a few important units rather than on building a ton of units.

The hero system, where players build an extremely powerful unit that gains experience to grow even more powerful as enemy troops are killed near them, further increases the micromanagement talent needed to succeed in Warcraft 3. For example, in the image above you see that the Orc player's shadow hunter hero is casting healing wave, which heals friendly units. At its first level the spell bounces to three units, healing all of them for a small amount of health. As the shadow hunter gains experience from killing enemy soldiers, his spell can be upgraded to bounce to more targets and heal more damage, making his spell an extremely potent healing ability. Each player may have up to three heroes at one time and they are extremely important to keep alive because they are the most powerful portion of any army and their abilities, health, and damage all improve as they level up.

Additionally, most regular units in Warcraft 3 have special abilities that can make them more effective in combat. In the above image, the Orc player's shamans, a spellcaster in the game, are casting bloodlust and purge. Bloodlust makes friendly units attack and move faster. Purge removes beneficial spell effects from enemy units and also slows their movement speed down. Both spells can turn the tide of a battle if used properly.

In essence, Warcraft 3 is a game that forces players to focus on using their units to their maximum potential rather than just building more of them. Thus, micromanaging each unit to keep them alive and attacking the most appropriate targets is an extremely important part of the game.

So, with that definition out of the way, let's move on to how micromanagement is used in Medieval: Total War 2.

Micromanagement in Total War
The only area where true micromanagement occurs in Total War is in the RTS component of the game, where armies clash on the battlefield. It begins with the deployment of soldiers on the battlefield, which both sides are usually allowed to do before the true battle begins.


The deployment screen. Players are allowed to move their troops wherever they wish in their area of the battle map and then hit start battle to begin.

Choosing the right location to deploy an army on the battle map is extremely important, as picking the right terrain to fight in can win or lose a battle. The geography of the battle map is based off of the campaign map. If there is a big forest on the turn-based map it will show up if there is a battle in that location. Many areas have hills, bridges, and other important features that a deploying commander should take advantage of. In the above screenshot, the hill in the foreground was where I chose to deploy my army, as it provides a great base of fire for archers and also tires the enemy force out as it moves up.

Choosing the right way to deploy the components of an army is also important for achieving victory. Ranged units like archers, ballistas, and catapults can all take a heavy toll on an advancing foe but they are extremely vulnerable to cavalry charges. This makes it a good idea to place them in a location where they can easily be defended by friendly spears, pikes, or heavy cavalry. In the example below an English army with dismounted heavy infantry and archers is facing a large Scottish force. The English player chose to place his archers slightly in front of his heavy infantry line. This allows them to fire on the Scottish army as it approaches and inflict as many casualties as possible, but also keeps them in a position where they can retreat and regroup quickly behind the protection of the infantry line.


It also helps that the Scots apparently didn't know how to make plate and mail armor, giving the English force a tremendous advantage in quality of troops.

Some other examples of deployment decisions a commander might want to make include grouping heavy cavalry units together to make a powerful opening charge, setting up long ranged weapons like cannons on hills to give them a better field of view, and choosing which special formations certain army units should employ. For instance, some cavalry units can be set into a wedge formation which gives them greater penetrating power in a charge.

So now the battle deployment is completed properly, is there anything else a commander can do to influence the victor? Of course. However, it's important to note that not every unit has the same potential for improvement with appropriate micromanagement. Some types of units can accomplish a lot more with careful control than others. So I will go through the main types of units in Total War and describe how to manage them appropriately.

Cavalry
Cavalry benefit the most from careful player stewardship. They are the fastest units in the game, which allows them to be sent as a quick reaction force to anywhere the battle is going poorly. They move fast enough that they can also be used to strike enemies in the vulnerable portion of their line, for example circling around to hit a pike-wall in their unprotected rear to inflict heavy casualties. Any time an opponent's infantry shows their rear is a great time to slam them with a cavalry charge. Cavalry also are great to micro because they do a lot of damage to enemy troops. Any fast, high damage troop is a great unit to micro as they can run circles around an enemy force while slaughtering anything they touch.


As these rebel archers discovered to their dismay when they tried to pull back to the safety of their village.

Cavalry have one more significant advantage over the other units in the game-they can disengage from melee combat without suffering catastrophic losses. If an infantry unit is in combat with another infantry unit it cannot pull back gracefully, it will take a few moments for the unit to regain cohesiveness and finally move back. This time period is long enough for a unit to lose quite a few of its members while it's trying to assemble.


In this example, the spear militia unit on the left is engaged in battle with the peasants in the middle so they are unable to just keep moving past without fighting with them for a while.

Cavalry differ from infantry in that they can usually be ordered to back out of close quarters combat and quickly move to a different location in the battle. This is a great feature to take advantage of at the start of a battle when the combat is usually between both side's archers and siege weapons. A player can send their heavy cavalry in for a quick charge to slaughter a couple units of archers or crossbowmen and then pull them back when support arrives for the ranged units.

Ranged Infantry
There are many types of ranged infantry available depending on which faction you play. England has access to powerful, extremely long ranged longbowmen and yeoman archers, Spain and Portugal have a number of javelin hurling units that do high damage but do not have as long a range. Most of the Italian factions rely on crossbows instead of longbows. What they all have in common is that they can be fiddled with to great effect in a battle.


Peasant archers, one of the weakest ranged units in the game.

The biggest advantage archers have is that they are more mobile than regular foot infantry. They do not wear thick armor so they move faster and tire less easily. This allows them to kite enemy troops. Kiting is a term that refers to moving back from an enemy while harrying them with ranged attacks-effectively inflicting great damage while taking minimal or none in return. How this plays out in battle is that a player with archers can have his archers split up in all directions and run while turning to pelt an enemy with arrows every so often. It may take a great deal of time but eventually the enemy infantry will die and the archers will take almost no casualties.


In this example, the Scottish infantry finally gave up and ran for it.

There are two considerations that a player using this strategy needs to keep in mind. One is that if an enemy has light or heavy cavalry it will not work very well, as cavalry can certainly outrun archers. The other is that some of the heavy infantry units will not take much damage from ranged attacks, so you may be stuck retreating when your archers run out of arrows or quarrels. Still, ranged infantry have a great potential for improvement with careful management by a player during battle.

Ranged Cavalry
Ranged cavalry are the best of both worlds-they're fast cavalry and they can also shoot at a range! They are also able to fire while moving so they can retreat while inflicting heavy casualties along their entire retreat path. The only major problem these units suffer from is that they carry much less ammunition than ranged infantry, particularly the cavalry units that throw javelins. This means that they may be left without any ranged capabilities a few minutes into the battle. However, this does not leave them useless. They still function as reasonably powerful light cavalry units and they still have a charge bonus. They can be useful for harrying enemy archers and for hitting the vulnerable rear and flanks of enemy positions.

Siege Weapons
Siege weapons do not have much potential for good micromanagement. They fire slowly, are fairly inaccurate, and cannot be moved readily. The best you can do is pick what you want them to try and hit and maybe they'll hit it one shot out of ten. I'm not particularly fond of siege weapons, they're useful for attacking cities and castles and that's about it.

Foot Infantry
As I mentioned previously in the cavalry section, foot infantry are difficult to micro because they are slow and cannot disengage gracefully from combat. What you can do is choose the right location to deploy them and use their special formation abilities, such as pike-walls and schiltroms, to maximum effect. These units tend to make up the main line of your army and serve as the axis on which the other components of your army are based. They provide a safe bastion for your archers and siege weapons, a place for cavalry to retreat to when outmatched, and will likely end up forming the majority of your casualties in every battle.

Conclusion
Although the Total War games certainly do not have the micromanagement focus of Warcraft 3, players can still manage their troops to win seemingly impossible battles through wise use of ranged kiting and cavalry maneuvering. However, it's important to keep in mind that the battle map's terrain can limit how much micromanagement can be done. Bridge battles are particularly brutal in this regard, there's a narrow path to fight on and not much that can be ordered to change the outcome.


During the Battle.


After the Battle.

so be cautious in where you choose to fight and victory will be yours!

The next article will be about macromanagement in Total War-how to appropriately purchase units, improve your economic state, and upgrade units and towns.

Wednesday, August 17, 2011

Military Formations-Total War

Individual fighting prowess and savagery is great for tournaments, small unit combats, or when a battle devolves into a messy mêlée, but even the most savage army will shatter and break when charging a disciplined military formation. The army that is able to best maintain their order of battle tends to be victorious in large engagements. Once a formation breaks it becomes a group of individuals who fight alone and die alone.


Even Mel Gibson couldn't lead this disorderly mess of highlanders to victory.

The Total War series does a great job of representing this fact in its battles. Unlike a lot of other RTS games that build individual units, units in Total War games are already a group. For instance, a spear militia unit contains 75 spearmen who move and fight as a group. Many units also have special abilities that change how they are deployed. Many spearmen can set themselves into a schiltrom formation where they form a bristling circle of spears and deploy their shields to defend themselves as best as possible. Pikemen can brace themselves into a pikewall that shatters any cavalry unit foolish to charge them.


Not the best place for a lord's weekly countryside ride.

Maintaining a formation is critically important when defending against an enemy attack. The most vulnerable units need to be protected by heavy infantry and cavalry units. These includes archers, catapaults, and other ranged units that tend to have little armor but provide critically important long range firepower. If they are not defended by the shields and pikes of the heavy infantry, they can be slaughtered by an enemy cavalry charge and quickly rout, leaving an army without any ranged support. This can quickly lose a battle for a commander.

The image below shows an example of a good defensive formation. The English commander has placed his archers behind a wall of spears as the rebel commander charges to meet him in battle. His archers get to fire on the charging horde with relative impunity as the rebel commander cannot get his troops past the English spears. The heavy casualties taken from archer fire eventually will break the morale of the rebel force and result in an easy English victory.


It doesn't help that the rebel force also moves as a mass that would be hard for an archer to miss.

It's just as important to maintain proper formation when engaging an enemy offensively. A bunch of charging lunatics may be impressive to behold but end up being rather ineffective when they don't hit an enemy position together in a coordinated fashion.


Even if they bear shields as intimidating as this fellow.

A good way to think of a proper offensive charge is as normal waves hitting a sandbag barrier compared with a tidal wave hitting the same barrier. The normal waves will hit the sandbags here and there frequently but they aren't able to sweep over it to flood the area protected. A tidal wave that hits with all its power all at once can sweep away the entire sandbag wall, devastating everything behind it. Similarly, sending your cavalry in small groups all along the entire wall of an enemy will probably not manage to penetrate anywhere, you'll just get pushed back and take heavy casualties. A cavalry charge that puts all its power in one spot and maintains a wedge formation can do a great job of breaking through enemy infantry, splitting them into divided vulnerable groups.


Here the charging heavy cavalry unit has split the spearwall apart, leaving all of its individual members easy prey for the swords and mounts of the heavy cavalry.

The other reason that it's important to keep an offensive in an organized formation is that heavily armored infantry, light cavalry, heavy cavalry, and lightly armored archers all march and run at different speeds. If they all move on the offensive in a mixed formation they get tangled together and cannot fight at their best. It's hard for an archer to fire his bow when he's trying to dodge the horses of cavalry and a swordsman's shield keeps hitting him in the back.


This army that decided to pop out of the city's walls en masse illustrates this problem. It's hard for a cavalry unit to form up for a charge on the besieging army when half of their men are stuck behind the archers!

The final realistic depiction the Total War series makes is that when a unit's formation is split their morale tends to drop precipitously, leading them to break and run from the battle. This simulates how vulnerable troops in a spearwall become when they are no longer able to deploy effectively to protect themselves. It ends up being every men for himself, and men in a war stuck fighting alone tend to find that discretion is the better part of valor.


This may leave them as easy victims for cavalry, but fortunately they don't have to run faster than a horse, they just have to run faster than their fellow foot soldiers.

Conclusion
Whether fighting offensively or defensively, it's critically important to keep your army organized. When an army loses its formation the defensive benefits of shield and pike walls are lost and its easy for an enemy general to outflank, surround, and slaughter each unit piecemeal. Just remember that a man who fights alone dies alone.

Sunday, August 14, 2011

Lessons on Looting from the Total War Series

For most of human history, soldiers grab as much loot as they can get their hands on whenever they succeed in taking an enemy city. This serves as a repayment for the risk of assaulting the walls of an enemy fortress and for the months of waiting around for siege equipment to be assembled or for the besieged town to run out of food and supplies. Many generals have allowed their men these few hours of rape, slaughter, and loot gathering as they serve as a great celebratory morale boost for an army, building their motivation to continue the war in hopes of gathering more wealth.


As depicted in the famous painting "Pillage of a Village."

The promise of loot has also historically been used as a way to bankroll wars. It does cost a lot to keep an army in the field, but imagine all the wealth behind the walls of Constantinople! Once we take the city it will all pay off. But is looting really an efficient way to finance a war? Let's take a look at how the Total War series simulates looting to see.

Looting in Total War
Whenever you take a city or fortress in Medieval Total War 2 you have three options once you take it. You can occupy the city, which gives a meager sum of money but leaves all the citizens and buildings intact. One may also choose to sack the city, which kills a small portion of the population and generates the most money. Finally, the city can be exterminated, killing 3/4 of the population and generating slightly more money than occupying the town.


Choosing to sack Antwerp yields 3,780 florins and kills about 1,200 people. 3 florins a person is a bargain!

The instant cash infusion generated by sacking a city makes war seem quite profitable, particularly when you take one of the famous large cities like Rome or Constantinople that can get you 20,000 florins or more. (For a point of reference, most military units in the game cost around 300-400 florins each, so 20,000 florins is enough to buy and supply an entire army). However, there are a few problems with relying on looting as a means to finance your conquests in a Total War game. The largest is simply that it is a one time cash yield. You can't really re-loot a town's priceless artifacts and gold stash.


Most towns aren't in a hurry to replenish their supply of easily portable valuables after they're stolen.

A second problem is that looting damages some of the buildings in the town, so if you're planning on holding on to the town you better pay to repair those buildings. That comes directly out of the looting profits.


I imagine it also makes a general look foolish when his troops rip all the copper wiring out of a building to melt it down and sell it and then he has to send engineers back next week to replace it.

A third problem is that castles and towns don't all have the same looting value. Many of the smaller cities and fortresses just aren't worth that much, meaning that the upkeep cost of maintaining an army besieging the town already cost more than the town was worth.


Some towns just don't offer great looting opportunities.

The final problem is more of an opportunity cost. The large number of people butchered in a sack of a town are people who don't generate revenue in the future, which will eventually add up to more lost funds than the looting generated. Also, towns are dependent on population growth in order to be upgraded and allow better military units to be purchased. Killing the population of a town means that it will take longer for the town to improve, potentially leaving you stuck with a bunch of towns that can't build more than unarmored guys with spears while your foes have full plate armor clad swordsmen cutting them apart.

Looting in the real world
That look at looting in the Total War series also reveals some of its problems in the real world. It's just not a great way to finance a conquest because it's undependable, who knows how much money each city you're invading contains? Another issue not represented in the Total War series is how much money undisciplined looting can squander. When you have a bunch of battle weary soldiers who are basically released to do as they wish for a few hours, most of the fragile valuable loot is likely to be shattered on the pavement or set on fire, limiting the value of a conquest to a considerable degree. It's hard to prevent this without a plan set in place by the commanding general(s) before the city is taken.


Every conquering army needs the services of Henry the Looter.

An additional issue is that rampant looting is not approved of by the world community in modern times. The suggestion made by some before the Iraq War that it could be financed through Iraq's oil revenues was silly, that would never have been allowed by the world community. Soldiers are expected to protect towns from looters nowadays, meaning that there isn't any money to be made by taking a city anymore. The only people who profit from a city's takeover are opportunistic citizens who take advantage of a lack of order to go to town stealing unguarded property.


Such as these delightful fellows looking for copper wiring in this burnt out car.

Conclusion
Looting cities is tempting and profitable in the short term, but it's a one-time yield of funds that should not be relied on to finance anything important. It also contributes to a lack of discipline in attacking armies as soldiers murder civilians and each other while grabbing everything valuable they can get their hands on. There's also the risk that the entire city will be burned to the ground by careless looting, as occurred many times in history.


Oops.

It's better to rely on the longer term more reliable income generated by taxes and the work of citizens in the town, especially in modern times. All of the loot taken by the Germans in WWII from Italy and other areas they sacked didn't add up to much compared to Germany's own tax and manufacturing base. A look at Iraq after the US occupation reveals another major issue-rampant looting actually can cost an occupier a significant amount of money because people destroy important buildings and infrastructure that has to be replaced, usually at a cost far greater than the value of the precious metals found by tearing out the wiring and plumbing systems of a city.

Tuesday, August 9, 2011

Alcohol + Caffeine = Bad Idea

The delightful drink Four Loko, named for its combination of alcohol, caffeine, taurine, and guarana, came out in 2005, although it wasn't widely known until the last year or so. It rapidly became a popular binge drinking choice as it contains a few beers worth of alcohol and enough caffeine to keep someone up all night for partying. These beverages are also pretty cheap, come in fruity flavors, and are packaged to look like a regular energy drink. From a packaging perspective, it seems a lot safer to drink two or three Four Loko cans than it would be to drink eight to twelve cans of beer, hence why these are so popular to guzzle down with no restraint. As an aside, with all the diligent students who drink Rockstar and other energy drinks in class, I always thought it would be hilarious to bring a Four Loko and see if anyone noticed.


Although sometimes even regular energy drink consumption is hard to miss.

As the consumption of Four Loko increased throughout college campuses, emergency rooms began to notice a trend. Heavily intoxicated younger folks kept showing up, some with extraordinarily hard blood alcohol levels. A recent report by some emergency department physicians at Bellevue Hospital Center in New York describes 11 cases they saw in a four month period. Two had to be hospitalized and about a third of the patients were in high risk situations, such as being heavily inebriated on subway tracks, when found by EMS.


The study authors also diligently searched all available medical literature for Four Loko references.

As a NPR news story adds, it seems that the combination of large amounts of caffeine with alcohol tends to lead to more dangerous levels of intoxication than alcohol alone. It masks some of the depressant effects of alcohol, allowing novice drinkers to drink much more before passing out or falling asleep, which normally serves as something of a barrier to excessive alcohol consumption. Instead, drinkers can continue to guzzle more alcohol, leading to potentially life threatening blood alcohol levels, or make extremely poor choices as they are kept awake by the caffeine while alcohol ravages their higher brain functions.

I can vouch for this effect personally, although I have not drunk Four Loko myself. I mostly went with Jagerbombs or other combinations of hard liquor and Red Bull. You can read more in detail about my own misadventure here if you like, but the crux of the matter is that I consumed a great deal of caffeine with alcohol and was wandering around with nearly full motor function with a BAC of .23, a level that should have had me in a stupor or unconscious. For reference, a .30 is about the BAC needed to be in a coma from alcohol. I was also in one of those high risk situations that the emergency room physicians were talking about, as I proudly lay on the roof of a three story building when the police came by to pick me up.

Conclusion
The official consensus is still out on whether caffeine and alcohol can be safely mixed, but coming from my own personal experiences, I would say that it's not a great combination. It certainly can be great to keep you up for a party, but it probably would be wise not to drink more than one Four Loko or other such mixed beverage in a night.


No matter how many this guy tries to sell you.

You can also watch this enlightening video for more information about the dangers of alcohol and caffeine.